How to link Snowflake accounts to Microsoft Entra ID via SSO
I am going to forget, unless I write this down somewhere.
First of all: why is this a good idea? Well, it allows users to log in less often (requiring fewer MFA challenges) and it allow IT to better control and lock access to Snowflake. This is great for interactive accounts.
This is a bit tricky to set up, but not too dramatic. You can obviously get a similar set of instructions via ChatGPT, or Copilot, where I get mine from, but that was outdated and littered with buttons and links that no longer exist or are now called something else.
This is what worked for me (as of early January 2026)
Part 1: in the Azure Portal go to “Enterprise applications”, then click on [+ New application] and look for "Snowflake for Microsoft Entra ID" from Snowflake Inc.
In the “Getting Started” section, look for section [2. Set up single sign-on]
In the first (1) [Basic SAML configuration] section, specify (at least) the Entity ID and Reply URL – you’ll find your account identifier on the Snowflake admin page.
Identifier (Entity ID): https://XXXX-YYYY.snowflakecomputing.com
Reply URL: https://XXXX-YYYY.snowflakecomputing.com/fed/login
Save the setting, but don’t test them yet (to avoid disappointment at this stage)
In the (2) [SAML Certificates] section, download the Certificate (Base64)
And in section (4) [Set up Snowflake for Microsoft Entra ID], copy the Microsoft Entra Identifier (“https://sts.windows.net/....”) and the login URL (“https://login.microsoftonline.com/ ... /saml2”)
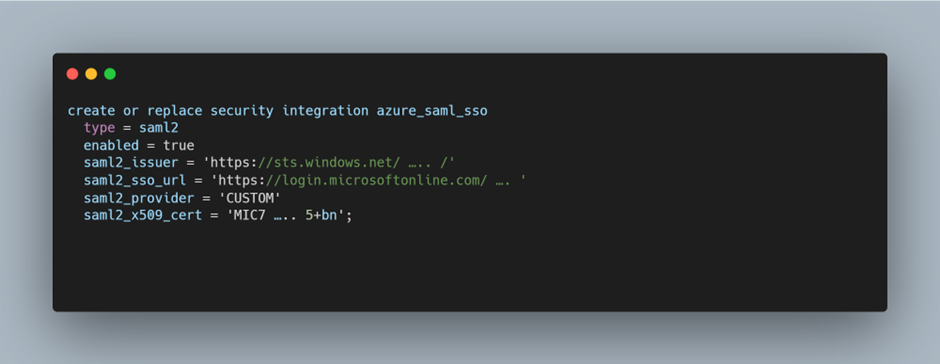
Part 2: In Snowflake, run the following bits of SQL:
Note – the saml2_issuer is the Microsoft Entra Identifier from above, the saml2_sso_url is the “login URL”. The content of saml2_x509_cert is the contents of the downloaded *.pem file from the certificate section, with the ——BEGIN/END CERTIFICATE— lines removed.
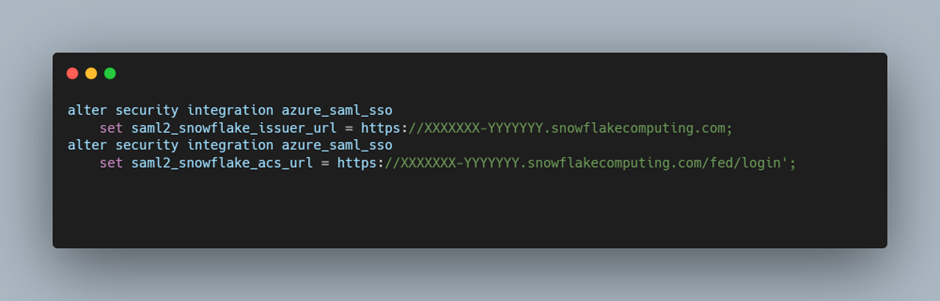
Then run these two statements to update the 2 URLs to the values found in your Snowflake account admin section (they are the same as above)
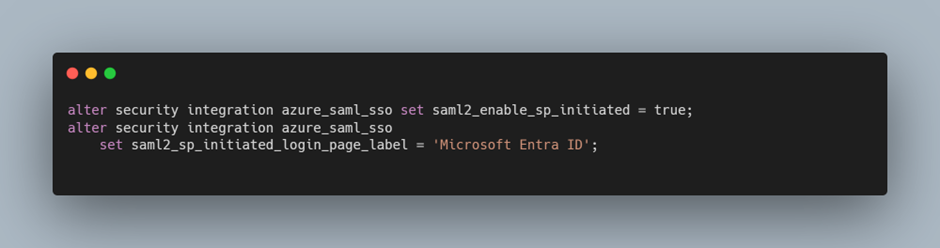
Then run these two lines to enable the Entra ID login button on the login page.
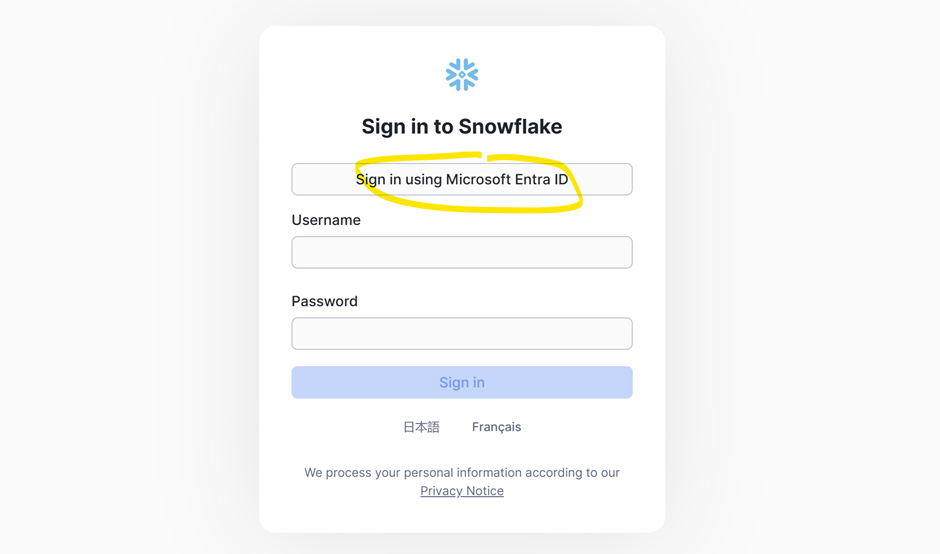
Et voila:
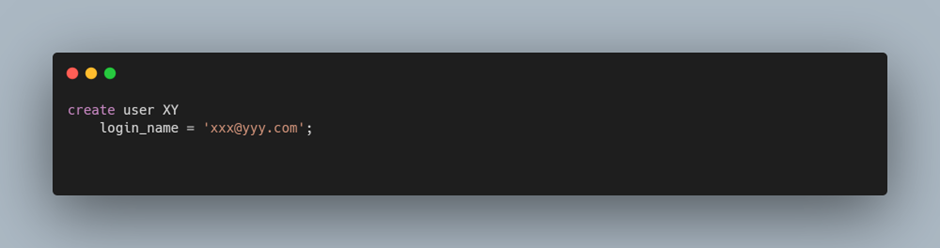
Then, finally, create users in Snowflake – with the Entra email address as a login_name.